We've lived in the house for about 3 months, now, and we're loving it! But clearly I've let the blog lapse, and there are a few details that I feel will be useful to others building an affordable modern home, so I'll try to write a few more posts.
One of the ways to keep the costs of building a home down is to take on some of the tasks yourself. The benefits of this varies, of course, with how much you value your time, and how handy you are. I'm certainly not that handy, so I kept my DIY tasks to a minimum: laundry room cabinets, and built-in closets.
Here is a shot of our laundry room; I picked up and assembled our IKEA laundry room cabinets and countertops.
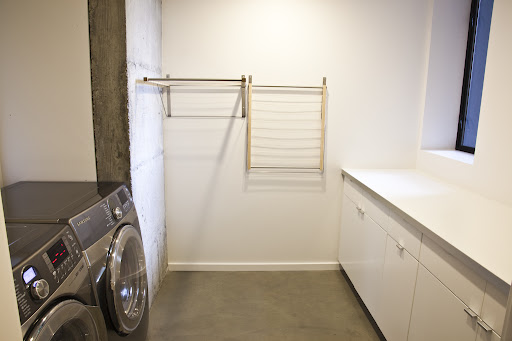
I had the finish carpenters actually set the cabinets and cut down and install the plinths and counters, since I didn't trust myself to do that well. IKEA cabinets are great and very well priced, but they're only cheap if you assemble them yourself. It's not a small task, as you can see from this stack of boxes I snapped before leaving IKEA.
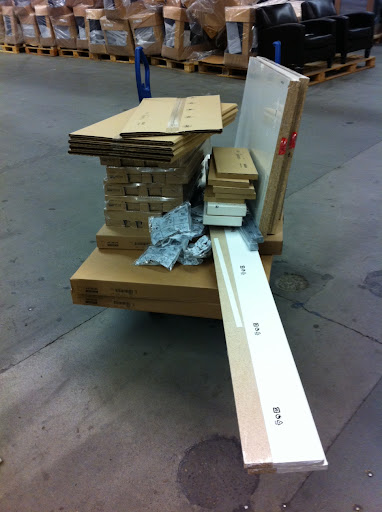
I can only imagine how long it would take to assemble a whole kitchen. We choose the Applad white drawer fronts, and the
Numerar white laminate countertop with aluminum edging ($99 for 8 ft of counter!). We also hung several IKEA clothes drying racks on the wall. On the left is our amazing Samsung washer and dryer (WF448AAW & DV448AEW). This brings up another tip; if your construction schedule allows, take advantage of Black Friday! These are the top-rated models available, and we picked them up for nearly half of their normal price ($750 each). Even better, we didn't have to brave the insane lines at Sears; we just sent the advertisement to our rep at
Albert Lee, and he matched it. A few days after Black Friday, they were selling again at about $1300 each.
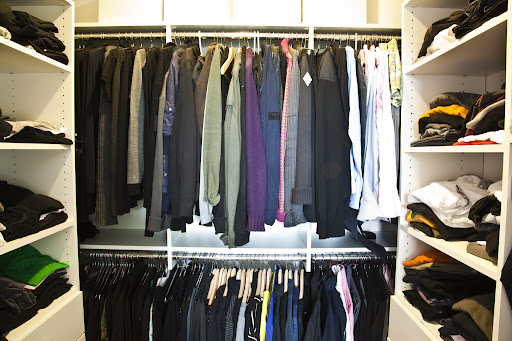
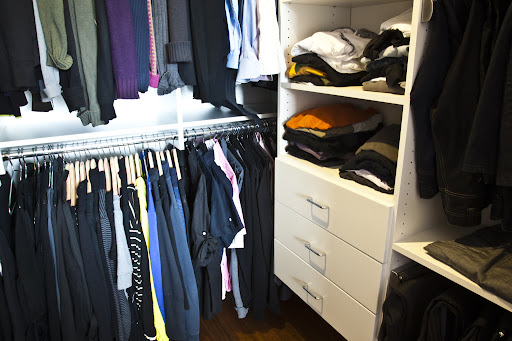
Another DIY project was our built-in closets. We originally only had budget for "rod and shelf", but I knew how important storage would be. So we decided to order custom built-in closets from
easyclosets.com, and install them ourselves (with a little help from our friends). These were a bit more complicated then IKEA cabinets, but well worth the effort.
Easyclosets lets you enter the dimensions of your closets in their online planner, and design your own closet arrangements; they then custom cut all components so you can use every inch of closet space available to you. Their planner is surprisingly well-designed, though you can also call an agent and let them design them for you. We tried it both ways, and found their agents did a better job. We also considered the Container Store's popular
Elfa system, but found it disappointing; it was much harder to customize to fully utilize our precious closet space (most components can't be cut), and Elfa was actually more expensive (even during their annual sale!).
So, we ordered three bedroom closets, a linen closet, and a coat closet. In total, we got over 1400 lbs of custom-cut melamine shelving, drawers, and metal components in over 50 boxes! UPS was a little flabbergasted. It took a solid 5 days with multiple friends to install, but the closets turned out great. Here are some shots.
If I have one negative, it's that I could smell the particleboard off-gassing for a good month or two. Easyclosets
claim on their site that the particleboard meets the strict California requirements for formaldehyde, but my nose definitely picked up the smell. So, I would suggest clear-coating the exposed edges not covered by melamine with a water-based polyurethane.